Best Practices for Using Stock Photo Images in Your Website Design

In a digital world where oftentimes your website is the first interaction you have with potential clients, you, of course, want to put your best foot forward. Between the design of the page and the images you choose, you are trying to entice the viewer to do business with you. So where do you find those perfect pictures and how do you size them effectively for your website? Here are a few best practice guidelines to help you find stock photo images and resize them for your website.
There are plenty of ways to go about cropping and optimizing your images. We will not be going into the deep dive of technical tutorials on that. You’re welcome… Instead here are the down and dirty basics that every website owner can use.
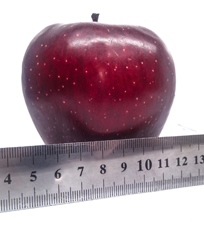
Try to make your images 800px – 1600px wide, and under 200k in file size.
What is a Stock Photo?
When you are building your website or any marketing plan, it is important to have images that convey the correct message to your audience. Sometimes, however, hiring a professional photographer and taking the time to sort through and process the images is simply not in the budget. Stock images are a viable option to consider in cases like this. They are existing photographs that you can purchase and download immediately. These ready-to-use images can be a great resource when you are short on time or limited on funds.
Be aware that there are numerous companies out there that you can search through to find the perfect picture. One can easily fall down the rabbit hole of searching, so start by having a good understanding of exactly what the pictures will be used for and the kind of image you want. There are two primary types of stock photo images that you will encounter as you search.
Rights Managed Images vs. Royalty-Free Images.
Rights Managed Images (RM) are pictures that you can download and use for the purchase price of the license. There are often restrictions on the use of these images, limiting the number of times you can use each image and the length of time the license is good for. This is called a pay-per-use model.
Royalty-Free Images (RF) are a bit more flexible. However, contrary to what their name suggests, stock photo images are often not free. You still need to purchase a license to use the photography. What royalty-free means is that you are free to use the images as many times as you like on as many platforms as you like after purchasing the license. No hidden fees later on, no royalties to the photographer, and no time limit on how long you can use it.
Most sites have a membership-type purchasing environment and prices have a broad range and every license has some restrictions. Whether you will be using the images for flyers, your website, or for other marketing materials, every one of these companies has different terms of use for their photos. Before you plop down the cash, we highly encourage you to read the contract and make sure you are covered for exactly what you intend to use them for.
Size Does Matter
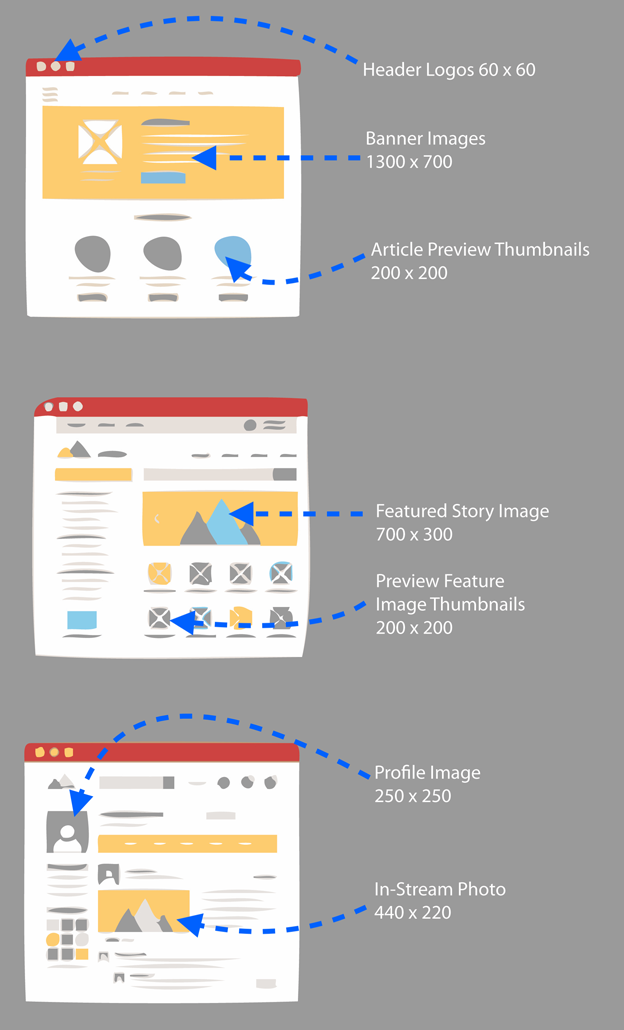
Here’s a super stripped-down reference sheet!
Ok, you’ve found the right picture with the right permissions at the right price… What size do you download? For many of us, the first instinct is to use the highest resolution photos possible. However, using big images can affect the time it takes for your website to load. That moment of dead space between hitting the ‘go’ button and the appearance of something amazing can be just enough time for a viewer to disengage and move on. But how do you get the speed you need without sacrificing the quality of the stock photo pictures? First up, consider the type of file you are working with.
JPEG vs. PNG
The file type is something to consider when you are using stock photos on your website. Two of the most popular files types you will find are JPEGs (.jpg) and PNGs (.png). These each have advantages to the type of file compression that makes them more ideal for a web environment. Comparing the two side by side, there is not much of a difference in quality, so there is no right or wrong answer here, but there are better applications for each.
Basically, JPGs are better for photographs. This type of file can handle all the colors in your photo in a relatively small file. When you save a file as a JPG, it compresses the file and discards some of the image information in order to make it smaller. This is both the greatest strength and biggest weakness of JPGs. It does create a smaller file, however, the image will experience some degradation the smaller you go.
PNGs are higher quality than JPGs but are often bigger files too. They are better for logos and graphs and images that need a transparent background. The standout feature here is the transparency aspect. This makes PNGs great for logos and other line drawings that have irregular edges that you want to see through to the background. Large flat areas and crisp lines are trademark characteristics of PNG files.

JPGs are better for full-color photographs PNGs are better for logos and line drawings
Optimize Your Assets
The higher the resolution, the larger the file will be. You can make a big image smaller, but not the other way around without getting some pixelation. So, starting with a high-resolution image in the correct format is the way to go.
- Start with a large file whether it is a JPG or a PNG (download a medium to large file)
- Minimize the resolution to 92 dpi (this is the highest resolution on most monitors)
- If available in the image processing program you are using “Save for Web” as a .jpeg or .png
- If your file is still larger than the recommended 200K, you can compress it further by using a website like https://tinyjpg.com or https://tinypng.com
- If you happen to be working in WordPress as your content manager, there is a plugin called Smush that can also help you optimize and compress your newly found images
- Then – Add spectacular stock images to your stellar site
Selecting, downloading, and optimizing the perfect images will require time and effort. Bear in mind that if your stock photo images are slow loading, washed out, or inconsistent with your brand, your customers may be less likely to stay and purchase from your site. As an alternative to the DIY version of this story, consider enlisting the services of your custom web development company. We will help you more effectively implement your imagery and all other website needs. Here at WEBii we are skilled at processing images and optimizing webpages for Search Engine Optimization results, and strive to provide the best experience both on and off-line to our clients.
Posted in: Fun Stuff, Quick Tips, Web Design, WWW Learning Center
Latest & Greatest
- Your Website is About Them, Not You: Digital Customer Experience
- Google Business Profile 101: How to Use it & SEO Benefits for Your Local Business
- The Power of Intentional Website Branding
- Competitive SEO Analysis: How to Keep an Eye On the Competition from an SEO Texas Agency
- Optimizing Your Online Registration Design for Better User Engagement
- Best Free Video Editing Software for Mac
- The Basics for Making Your Website More Accessible
